
Let’s imagine that your users have the ability to publish articles on your WordPress site and you want to add the ability for them to upload a preview image. Or maybe you’re thinking of running a contest for the best digital work and want your users to upload it to your site for review.
You have already searched the whole Internet trying to find a magic piece of code that would allow you to easily implement a simple and pleasant file upload form to your site, but have no success finding what you need. Then continue reading and it’s quite possible that you will find what you were looking for.
In today’s article, we will show you how to make a simple and elegant WordPress file upload form for the front end using the DropzoneJS JavaScript library. Also, you will know how to upload files using AJAX and process them on the server-side.
What is DropzoneJS
DropzoneJS is an open-source JavaScript library that will help you create a nice drag and drop form for uploading files. The library allows you to turn form or any other HTML element into a dropzone and provides high sets of features and customization options.
Below you will find a small list of the main features of the library:
- Customizable image thumbnail previews
- Retina ready
- Multiple files file uploads
- Progress bar included
- Support for large files upload
- Customizable theme
- A large set of event listeners
- Images resizing before upload
- Does not depend on jQuery
- Available as an AMD module for RequireJS.
Browser Support
DropzoneJS compatible with next browser versions:
- Chrome 7+
- Firefox 4+
- IE 10+
- Opera 12+ (Version 12 for MacOS is disabled because their API is buggy)
- Safari 6+
Preparation for creating the file upload form
Before we start creating the file upload form, you will need to download the latest version of the DropzoneJS library. You can do it just by using the library project page on Github
After you download the project archive, you will need to unpack it and inside you will find the dist folder in which the files needed for our work are stored. Minified versions of the files can be found in the min folder.
In our tutorial, we will create a simple WordPress plugin that will contain all the necessary elements to implement a full-fledged upload form, which you can further expand or modify according to your needs.
To start let’s create a folder called mwp-dropform under wp-content/plugins/ directory of your staging website. Inside it, we’ll put the mwp-dropform.php file. The file will contain the MWP_Dropform class with several methods and serve as the starting template for creating our upload form plugin.
You can find an example of our starter class below.
Please don’t forget to activate your wordpress plugin under Dashboard -> Plugins -> MWP Dropzone Uploader
Next, we need a brief step by step plan on what to do further in order to achieve our goal:
- Create a shortcode for displaying the form on the front end
- Add DropzoneJS files to our plugin
- Configure DropzoneJS to handle our file upload form through JavaScript
- Create a method for server-side handling uploaded file
- Create a method for deletion uploaded files
Creation the file upload form shortcode
To create a shortcode in WordPress, we will use a special function add_shortcode(). This function accepts 2 arguments
- $tag – unique name of the shortcode that the system will look for in the content;
- $callback – the callback function which will be run when the shortcode is found;
Also, you can find that we already registered one shortcode with unique name mwp_dropform within the __construct() method of our class.
In our case, the role of the callback function will be played by the method of our class form_shortcode, which also takes 2 arguments
- $atts – an associative array of attributes, can be set to empty string if you don’t have any;
- $content – the enclosed content, in our case there is no enclosing content so the argument is set to null;
Inside our method, we created a $form_html variable that will store and return the HTML content needed to display the file upload form.
As a part of our goal is to show form only to a registered user, we will need to add an additional IF statement using WordPress function is_user_logged_in(). The function helps us to determine whether the current visitor is logged in or not. It returns True if the user is logged in and False if not.
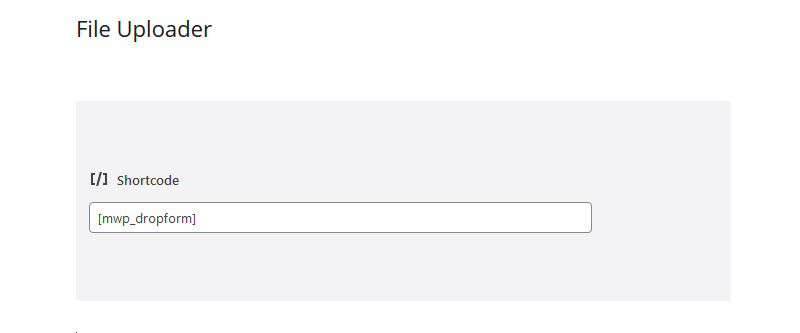
Now, when our shortcode is registered and ready you can create a separate page on your website and insert in the page content next shortcode [mwp_dropform].
Adding DropzoneJS library to our WordPress plugin
First of all, in the root directory of our plugin, we will create an assets folder for additional CSS and JS files. Next, let’s take the already unzipped DropzoneJS library and copy the minified files dropzone.min.css and dropzone.min.js into the corresponding subdirectories.
We will also create additional files mwp-dropform.css and mwp-dropform.js through which we will modify and control our upload form.
As a result, you get the following folder structure:
- mwp-dropform
	- assets
		- css
			- dropzone.min.css
			- mwp-dropform.css
		- js
			- dropzone.min.js
			- mwp-dropform.js
Now that we have prepared all the necessary files, we need to include them to the front end of our WordPress website, where file upload form will be shown. To implement this task, we need to use two methods of our class.
enqueue_front_scripts()– the method which will be responsible for all JavaScipt files which must be included by our plugin on the front end;enqueue_front_styles()– the method which will be responsible for all CSS files which must be included by our plugin on the front end;
In order to allow WordPress to process the above methods, we added two next hooks within the__construct() method of our plugin class
add_action('wp_enqueue_scripts', array($this, 'enqueue_front_styles'), 10);
add_action('wp_enqueue_scripts', array($this, 'enqueue_front_scripts'), 10);
wp_enqueue_scripts – is a WordPress hook that are using to enqueuing scripts and styles which must appear on the front end
In addition, we used wp_localize_script() function to pass data object from server-side to our script mwp-dropform. Function receive next arguments
$handle– the name of the script to which the data will be attached;$object_name– the name of the JavaScript object which will be passed to our script;
The data object contains the path to admin-ajax.php and AJAX handler action names required to handle file upload and deletion.
Configure DropzoneJS for handling file upload form
Now when we have a ready HTML form and all the necessary files are included, we can start the DropzoneJS configuration. All our JavaScript code will be placed in the mwp-dropform.js file.
Dropzone can be easily initialized by adding the dropzone class to HTML element.
In our example, we will create dropzone programmatically. To start, you just need to add next piece of code to your JavaScript file
var myDropzone = new Dropzone("div#mwp-dropform-uploder", {
								url: mwp_dropform_cntrl.upload_file
							})
Here, the first parameter is an ID of HTML form which will execute the role of file upload field and url is an option that let Dropzone to know where to post processed data. In our example url will lead to the mwp_dropform_upload_handler – AJAX action registered through hook in our class.
Next you will need to add few useful configuration options within braces:
params– additional parameters transferred to the server, can be an object.paramName– the name of the transferred param. Here we will set the name of the variable which allows us to get our file data on the server-side.- acceptedFiles – set accepted the file’s mime type or extension. ‘image/*’ – allow accepts all images
- maxFilesize – allows to set up a maximum size of the uploaded file in Megabytes
addRemoveLinks– if set to true will add a link to file preview, which allows to remove or cancel uploaded file
For handling responses received from the server-side through AJAX request we will use 2 Dropzone events success and error
Success event will be called if the request succeeds and will accept 2 arguments file object and JSON response object.
success: function (file, response) {
				file.previewElement.classList.add("dz-success");
				file['attachment_id'] = response.attachment_id;
			}
In addition, on successful upload, we will add an attachment_id received from the server to the file object.
To handle errors occurred during upload you will need to use error event, which accepts file object and error message
error: function (file,response) {
				file.previewElement.classList.add("dz-error");
			}
And finally, the last event that we will use is removedfile. It will be called when a file is removed from the preview list of our form. Inside this event placed a code which takes attachment_id, nonce field value, and sends them through AJAX request to our server to delete the file. For handling data from this event will be responsible AJAX action mwp_dropform_delete_file
How to handle files uploaded through AJAX in WordPress
In this section, we will discuss one of the key methods of this lesson handle_form_data(), which is responsible for processing form data and uploading files received on the server-side through an AJAX request.
First of all, we need to add custom AJAX endpoint and special hook which allows us to handle it. To do this you just need to add action with the name in next format wp_ajax_$youractionname and callback function pointing to the handle_form_data method. In our example hook name will be wp_ajax_mwp_dropform_upload_handler
Before start handling uploaded file, we need to make sure that the data in the $_POST request came from our form, and not from some malicious third-party source. To do this, we will add an IF statement to check the existence and verify our nonce field mwp-dropform-nonce.
wp_verify_nonce() – it’s a function responsible for nonce verification sent within $_REQUEST variable. And it’s receiving 2 arguments.
$nonce– nonce field value which will be used for verification. In our case it’s$_POST['mwp-dropform-nonce']variable;$action– the name of the action created bywp_nonce_field()function inside our form. In the case action name ismwp_dropform_register_ajax_nonce;
Now that we have verified that the data sent through the HTTP request belongs to our form, we can start processing the uploaded file.
All data required to handle files uploaded to the server can be found in the global $_FILES variable. $_FILES represents an associative array of items uploaded via HTTP $_POST request. Below you can find an example of data stored in a $_FILE variable after files being uploaded from our form to the server.
Array(
	[mwp-dropform-file] => Array
		(
		[name] => test.jpg
		[type] => image/jpeg
		[tmp_name] => \tmp\phpD44.tmp
		[error] => 0
		[size] => 57099
		)
	)
As $_FILES variable is an array we will use foreach loop to process each file in it. Inside our loop, we need to check is file uploaded successfully or with some errors. To do this we added below piece of code to our method
if ($_FILES[$file]['error'] !== UPLOAD_ERR_OK) { // If there is some errors
...
} $_FILES[$file]['error']– variable responsible for storing error keys, they represented by integer values 0-8;UPLOAD_ERR_OK– means that the file uploaded successfully without any errors;
Within the conditional statement, we are checking for error which may appear during file upload to the server. If variables are not equal it’s mean that file uploaded with some errors and we will return JSON response with error message back to our AJAX request using wp_send_json() function.
Our response JSON object will contain 2 values:
- status – ‘ok’ if everything successful, otherwise ‘error’;
- message – notification text which can be handled in AJAX response and shown to the user;
Finally, after all the checks, we can start processing the file uploaded by the user. A special function media_handle_upload() will help us to save the submitted file and creates an attachment post for it.
In our example we will pass few variables to the function
$file_id– index of our file within$_FILESarray. Within our loop index value will be represented by$_FILES[$file]$post_id– the ID of the post to which you want to add a file as an attachment. Also, it can be set to 0 if you just need to upload a file to WordPress media library without attaching it to any post.
$attachment_id = media_handle_upload($file, $post_id);As a result of execution, the function will provide us with the ID of the attachment or return WP_Error object if something went wrong. The result will be stored in $attachment_id variable.
To check results for error we will use is_wp_error() function which accepts one argument and returns True if it’s WP_Error object or False otherwise.
if (is_wp_error($attachment_id)) { // Check for errors during storing file
...
}
After file being uploaded you can find it under Dashboard->Media->Library. Also, we will send JSON response which will contain up to 3 values:
- status – ‘ok’ or ‘error’;
- message – notification text;
- attachment_id – the ID of attachment post for uploaded file
How to delete files uploaded through AJAX
The delete_file() method will be responsible for the deletion of an already uploaded file from the server. This method accepts 2 input values from the $_POST request
attachment_id– the ID number of the file uploaded to the WordPress media library;mwp-dropform-nonce– security tokens used to protect forms from different types of attacks;
Just don’t forget to add AJAX endpoint handler using action with the name wp_ajax_mwp_dropform_delete_filedelete_file method to the __construct() method of our class.
Firstly, we need to make sure that both variables exist in $_POST request and nonce field verification returns True.
Secondly, we need to be sure that attachment_id is an integer number. For this purpose, we will use absint() function which converts a value to a non-negative integer and helps us to avoid malicious content.
Finally, when all checks passed we can start deleting our attachment by using WordPress function wp_delete_attachment() which accepts next arguments
$post_id– the ID of attachment which must be deleted. In our case it’sattachment_id;$force_delete– if value set to True then attachment will be permanently deleted, otherwise moved to Trash;
In addition, we added variable $results which store the result of function execution. wp_delete_attachment() – will return either False/Null on failure or post data on success. You can easily define response on successful and unsuccessful completion of the task with simple IF statement
You can fin full plugin code on my github page


Hello and thanks a lot for this beautiful plugin!
I had it tested now in WordPress 5.7 and had a few issues with it :
– the Dropzone.autoDiscover statement shouild be pulled out before the $(document).ready function. Otherwise you still get the ‘dropzone already’ attached error
-in my case the html elements needed to include a
<
form> and an action= .the action is necessary but dummy because replaced inside. I tried without but always got the ‘dropzone has invalid elements’ error
After correcting, everything else works like a charme now. Hope this helps and keep on going with it, please!!
Hi
Can you please make demo link, much appreciate